Modern suburban construction is experiencing another boom. Today you can see domes, spiers, and multifaceted structures crowning mansions located in the suburban area, but classic solutions remain relevant. These include a gable roof, which is not very difficult to build with your own hands. This article is precisely devoted to the issue of creating such a design.
Content
Design features of a gable roof
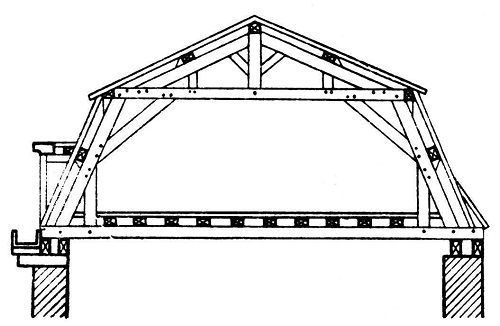
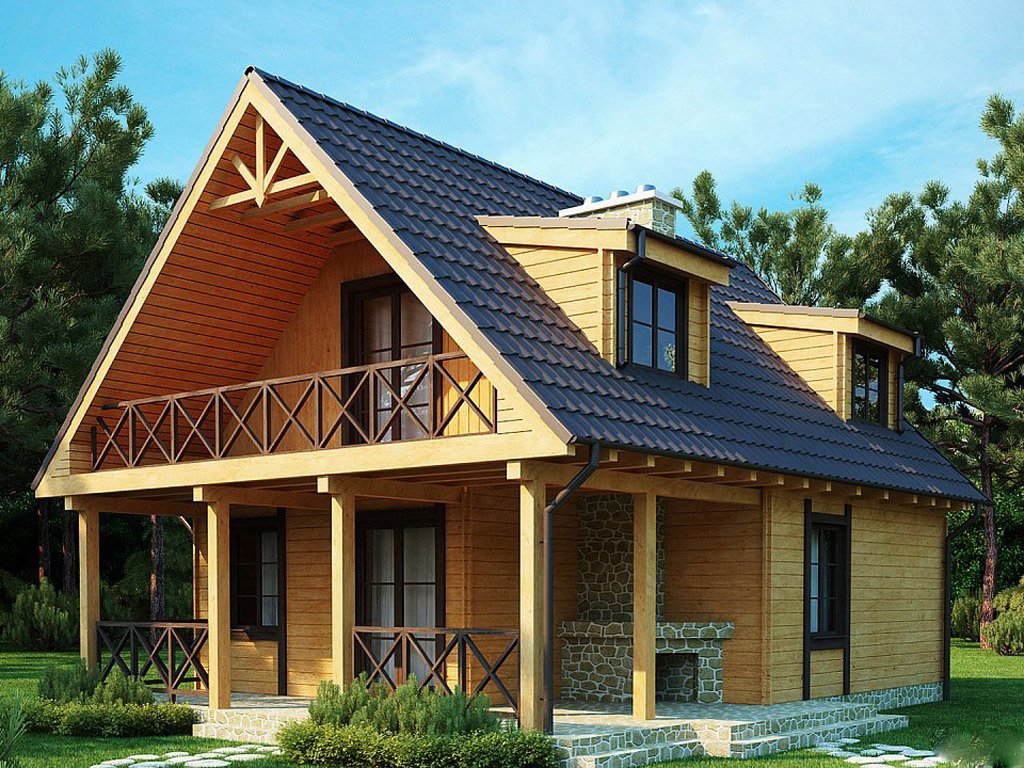
The use of the gable roof structure suggests that it will be supported by two walls located at the same level. The resulting attic space is located between two slopes and triangular-shaped walls. These are gables or tongs.
The design and technology of creating a roofing cake depends on how the attic space will be used. If you plan to create a living room here, then warming is carried out, and additional windows are created that are necessary for insolation and ventilation of the room.
The living space under the roof is called the attic and certain skills are needed to create it. If this is exactly your case, then we recommend reading the articles on the creation of the attic, which can be found on our website.

The decision to install the attic should be taken at the design stage, as this will save a lot.
Types of gable roofs
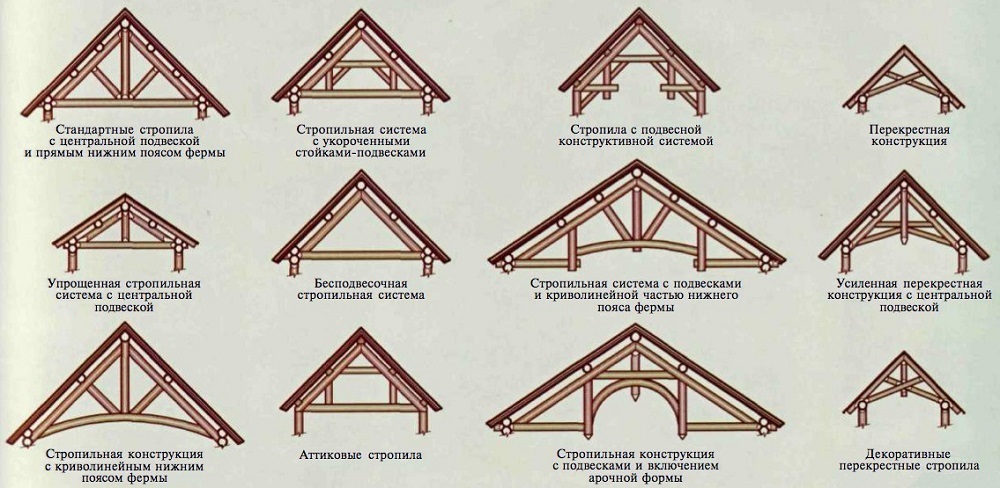
As a rule, all structures are distinguished by the angle of the roof. It depends on several factors, one of which is the type of material used to cover the roof. One of the most common options today is the angle of inclination of slopes 35..40 degrees.
Such a roof will easily tolerate snowfall, because it will not accumulate snow, and various garbage brought by the wind will not be collected here. The only drawback is that it will be inconvenient to equip housing in the resulting attic.
Those who know firsthand how to make a gable roof, try to compensate for the lack of a conventional design. They use its advanced variety, which has broken ramps. In this case, the upper part of the roof is flat, and the lower one with a sharp slope. This type of roof can withstand heavy snowfalls, copes with the wind load and is suitable for arranging a living room.
Calculation of the roof area
This is one of the important design elements, since the whole process of work depends on how correctly the calculation is performed. Any mistake will literally be expensive, because the materials will need to be purchased already during construction. In order to simplify your work, you need to follow a number of rules:
- Do not take into account the presence of ventilation holes, chimneys or roof windows, as this will only cause additional confusion.
- Determine the exact length of the ramps, the lower point of which is the cornice, and the top is the skate.
- Determine the length of the roof by the ridge (the results obtained in these 2 points are multiplied and give half the required area for a simple roof shape).

Please note that parapets, overhangs, and firewall walls are also required.
It is worth saying that in the case when rolled roofing materials or soft tiles are used, the length of the slopes will be reduced by 70 cm. Before making a gable roof, the entire area of the future structure is divided into simple elements, and calculations are carried out for each of them, after which the result is added. In most cases, knowledge of any complex mathematical formulas is not required, since the most popular types of roofs are assembled from rectangular or triangular shapes.
Types of rafter systems
Rafters - this is the main structural element of any gable roof. They can withstand the weight of the roof, and the weight of what has accumulated on it, so they are chosen with a margin. There are only two types of rafters - hanging and layers.

Hanging rafters rest on the extreme supports, so they work both on compression and on bending. Since this design creates a substantially bursting force in the horizontal plane, a wooden or metal tightening device is required at the base of the rafters.
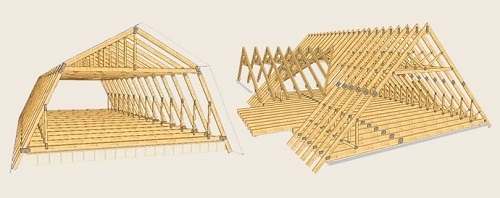
The choice of one of the types of rafters depends on the size of the roof and the design of the house. If there is an average load-bearing wall, then it can be used as a base for lay rafters. Intermediate column supports are also suitable. The ends of the rafters should rest on the walls of the structure, and their middle part on the walls or supports, so their elements work like beams - on bending. The advantage of such a roof is its low weight.
When installing the rafter system of a gable roof, the use of hanging rafters is advisable where there are no intermediate supports. The vamps can only work if the distance between the supports does not exceed 6.5 meters. The width of the rafters can be increased by introducing additional supports. If one additional support is used, then the distance will be 12 meters, and for two - already 15 m.

To make the rafter fit snugly to the beam, you need to attach it to the place of attachment and note where the cut will be made. The presence of a cut will allow the beam to lie firmly on the beam. Such a place is called a “thrust bearing”.
If the house is built of timber, then the rafters rest on the upper crowns, and their fastening is carried out with the help of a bolt, staple or nail. The rafters are joined by joining with metal pads and bolts. In other cases, it is recommended to use Mauerlat, which will be described below.

The calculation of the rafter system directly depends on the size of the house and the type of roof. The larger they are and the more interesting the shape of the roof, the higher the complexity, therefore it is better to entrust this task to a professional, since the price of an error in this case may be too high.
Mauerlat Mount
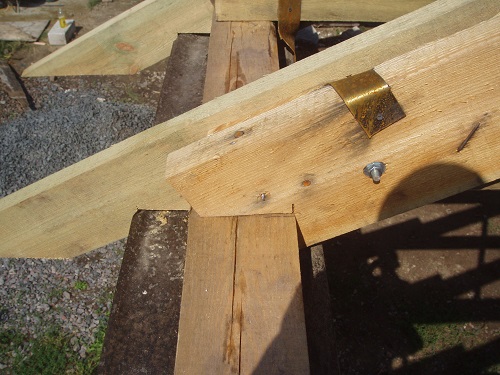
Mauerlat is the foundation on which the rafters will rest. Usually, a beam with a cross section of 15x15 cm claims this role. Such an element copes well with the distribution of load and can serve as a foundation for the roof. Mauerlat is placed under the rafter foot along the entire slope of the roof.
The outer part of the beam is usually flush with the plane of the walls, and brickwork gives it additional strength. An obligatory moment when installing Mauerlat is the creation of waterproofing. Roofing material, which is better to put a couple of layers, is perfect for this role.
A large roof weight is not the best way to protect it from the winds, since its area is high. To avoid unpleasant situations caused by strong winds, it is best to securely fasten the Mauerlat. This is one of the important points that you need to pay attention to everyone who wants to know how to properly make a gable roof.

Avoid situations where the rafters and Mauerlat mounts are nearby.This significantly weakens the support beam, so it is better to distribute the holes for the studs and the contact points with the rafters away from each other.
There are several ways to solve this problem:
- Whetstones. They are laid in several rows before the completion of the wall. Mauerlat is held with the help of brackets driven into them.
- Hairpins. Installation of these elements is carried out when the laying of the walls is almost complete. The diameter of the studs is 12-15 mm, and the installation depth is at least several rows. The distance between these mounts is selected within 150..200 cm.
- Steel wire with a section of 3..4 mm. It is installed in the masonry several rows before the completion of the wall and must have ends that allow it to reliably tie the Mauerlat. The number of such tabs should be more than the number of rafter legs.
- Reinforced concrete belt. This is the best solution for foam concrete, gas silicate blocks and other materials having similar properties. Fastening is done through threaded rods installed in the formwork before pouring. Concrete grade and reinforcement density are selected according to the design.
In the case when studs are used for mounting the beam, it is required to drill holes in it.

The washer is first put on the studs, and then the nuts are tightened. In the case where reinforcement is used instead of studs, the nuts or plates are simply welded to it after the Mauerlat has taken its place.
Thermal insulation and lathing
Specialists who know how to properly make a gable roof pay special attention to this particular stage of the work, since for all its simplicity it is one of the most important.
The task of the insulating material is to maintain heat in the room and prevent its leakage through the walls. Combined heaters made on the basis of mineral wool are usually chosen for this role. Thermal insulation is carried out in conjunction with the creation of a waterproofing layer and the laying of vapor barrier material.
A waterproofing layer is a special membrane that is fixed on top of the rafters, so that there is a certain distance between this layer and the sheets of roofing material. The width of the gap depends on the technology chosen and the type of roof covering. It can vary within 2..5 cm.
When waterproofing is done, heat-insulating mats are laid. They are fixed between the roof rafters, after which you can start installing the vapor barrier membrane. It should be on the inside of the room and can be held with brackets. The membrane is overlapped and the joints are glued with a special tape. On top of the vapor barrier, the material is mounted, which will be used for interior decoration.
The rafter system with a do-it-yourself roof is almost complete and all that remains is to put the crate and mount the roofing material.
The lath is laid on a beam located along the rafters - a counter lath. The main objective of this element is that it allows you to create an air gap between the layer of waterproofing material laid on the rafters and the roofing material. This gap is necessary to remove moisture that enters the waterproofing from above or exits in the form of vapors from below. When creating proper ventilation, the waterproofing material will almost always be dry.
The design of the crate in the general case is of two types. The first of them is trellised. This option is preferred for metal or slate, however, the step is selected taking into account the technology used. The second type of crate is solid. If the lattice structure is obtained from a 50x50 bar or board, then the solid can be made from 12 mm plywood, OSB sheets or even boards. If any of the points is still unclear, then to understand how to make a gable roof, the video posted on our website will be very helpful.
Installation of roofing material
The final stage in creating any roof is the installation of roofing material. It is worth saying that in each case there are some specific nuances, ignorance of which can lead to additional costs. Therefore, this article will provide only general information, and more detailed information can be found in articles on the specific technology of the roof device.
One of these common points is the device of the cornice, which gives the finished look to the building. If a gable roof is created according to SNiP, it is better to release the crate 30-40 cm outside. This will protect the walls of the house from rain on them falling down the roof slopes.

Since the design of the lathing is made of wood, most likely it will be prone to warping, which means that you should avoid observing straight lines and put the bars “in the run”.
If you have the required amount of materials, tools and hands, you can perform all the necessary operations in just a few days.
Above, we talked about how to create a gable roof with your own hands step by step, so if necessary to build a simple structure will not be difficult.



Alas, no comments yet. Be the first!