Content
How to properly install corrugated board
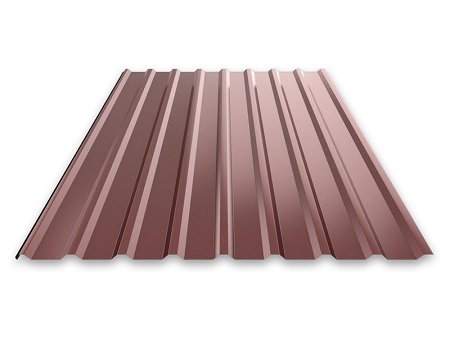
Professional flooring or professional sheet is called a modern building material, which is widely used for facing work. He gained his well-deserved popularity due to many excellent qualities and the fact that the installation of corrugated board is carried out in a convenient and simple way, accessible even by non-professional masters.
If we consider the structure of corrugated board, then it looks like a kind of “puff pie”, the basis of which is galvanized steel sheet. It is coated with an anti-corrosion compound, on top of which a primer is applied, and then a polymer coating. From the side, the sheet looks like a corrugated metal having a different profile. It can be wavy, triangular or trapezoidal.
Since corrugated board is distinguished by its versatility, it is used to cover vertical and horizontal surfaces. Naturally, the question of how to fix corrugated board will be decided on their specific appearance. Next, we will talk about some of the nuances of the device coatings and fences using a profiled sheet.
Due to its plasticity, corrugated board can take on almost any shape. A variety of sizes allows it to be used both as an excellent roofing material, and as a material for facing facades of buildings and ceilings, and the device of load-bearing floors. It is used in the construction of garages, hangars, fences and other structures and fences. The professional sheet is lightweight, which makes it easy and safe to transport it to the construction site. This is also a great advantage when you need to mount corrugated roof and lift it to a height.
In comparison with other facing materials, the profiled sheet has obvious advantages, for example, it differs
- corrosion resistance and, as a result, long service life;
- high ductility, convenience and ease of installation;
- practicality and resistance to ultraviolet radiation;
- significant strength with a relatively thin sheet thickness;
- convenience during transport;
- affordable cost;
- environmental safety;
- during the construction of buildings allows you to save other, more expensive materials;
- lack of costs for further care and maintenance.
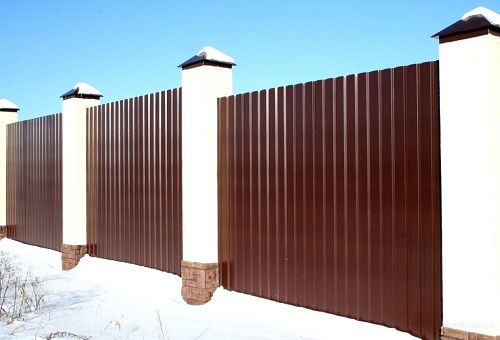
Installation instructions for corrugated board allow installation work on the installation and fastening of this material on various structures and surfaces - walls, ceilings, roofs, fences, etc. Thanks to her, work with a professional sheet can be available to everyone who wants to take a more economical approach to building their own home and who in the future wants to proudly present to others the result of their skills.
What else captivates this modern material is the opportunity to decorate any building. With the help of a professional sheet, you can really change or transform the appearance of a building - its facade or roof. Having a diverse assortment of color shades and profile geometry, you can make your home or fence original and unique.
Among the advantages of corrugated board (which many professional masters and just amateurs have already appreciated) is endearing ease of work.It is this advantage that made the professional sheet a leader among the building materials used to cover roofs and when installing walls and fences.
How is roofing profiled sheet fastened?
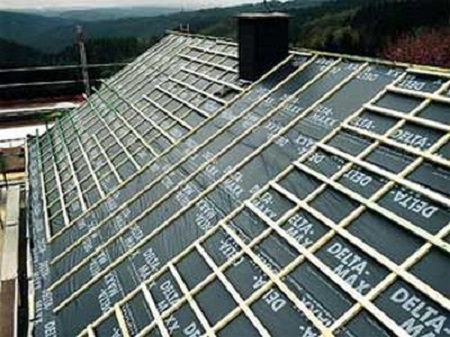
Before attaching the corrugated board to the roof, it is necessary to install such an important structure as a crate. The material for it is wooden bars, which are pre-treated with an antiseptic. It is also made of steel runs.

In the process of installation, sheets with different corrugation heights are used, but keep in mind that its minimum height is at least 50 mm.
Thinking how to properly cover the roof with corrugated board without the help of specialists, it is important to adhere to the following sequence:
- 40-50 mm thick strips are nailed to the roof rafters, to which later on the battens will be nailed. Under them by this time should be subroofing waterproofing. It can be arranged using roofing material, roofing felt or glassine.
- Further, to eliminate the well-known problems of condensate accumulation, mold spread, rafters and lathing wetting, overcooling and freezing of roof structures, vapor barrier and waterproofing are arranged. It is placed on top of the crate device, leaving a gap of 4-5 centimeters between it and the underlay. It will provide ventilation of the air space under the roof structure.

Fixing the profiled sheet on the roof necessarily provides for the presence of gaps for ventilation, as well as the laying of a special waterproofing film that will allow the vapor to form. The film must be overlapped, the value of which is not less than 100-150 mm. Its sag between the roof rafters is usually 20 mm. This connection provides excellent sealing, which is further enhanced by additional gluing of the joints of the film with a self-adhesive tape.
- Before attaching corrugated board to the roof, you must first measure the length of the roof slope and choose the right material. It is better if the length of the profiled sheet is not less than the length of the ramp. Why? Then the roof will not have transverse joints and, accordingly, its moisture-proofing properties will improve, and installation work on its device will also be simplified. If, however, the profiled sheet is shorter than the roof slope, then the sheets will need to be mounted in rows in a horizontal direction. Start work from the bottom row of the roof, successively rising towards the top of the roof. Laying sheets begin from any edge of the roof - right or left. At the junction of the sheets of the lower and upper row, it is necessary to overlap. Its size is not less than 20 centimeters. After laying the profiled sheet, the joints are filled with sealant.
- If you are thinking about how to properly cover the roof with corrugated board, then when installing the top sheet of the roof, remember that a gap must be left between it and the insulating layer to ensure ventilation. The height of this gap should vary from 2 to 4 cm.
- Sheets are attached to the crate using self-tapping screws. Their diameter can be different - 4.8; 5.5 and 6.3 mm, and the length range from 19 to 250 millimeters. You can use screws that have a flat or hexagonal head. If you use screws, then under their head it is imperative to put a plastic or rubber washer.
- One of the important questions, how to properly cover the roof with corrugated board, is the question - in what places of the crate should the corrugated board be fixed? This should be done at points where the wave of the profiled sheet is adjacent to the crate. In this case, there is no lever between the attachment point and the application of force to the self-tapping screw.
- When the sheets are fastened to the upper and lower boards of the crate, it must be done in each wave of the profiled sheet. The reason is that these areas have the largest wind loads.When the sheets are attached to the intermediate boards of the crate, you can do this through one wave.

When deciding how to cover the roof with corrugated board in places of longitudinal joints, remember that this must be done in increments of at least 500 mm.
How to mount a wall profiled sheet
Installation instructions for decking allows you to work not only on the device of the roof, but also the walls. Such work is carried out when necessary
- in warming an existing wall;
- in the wall cladding from the outside or inside;
- in the device of the wall from the corrugated board itself.
Detailed description of the work performed
- Insulation of a wall that already exists.
Brackets are fixed in the bearing wall, after which the corrugated board is installed. Fasten the wall profiled sheet to the base with the use of polyamide plate dowels.
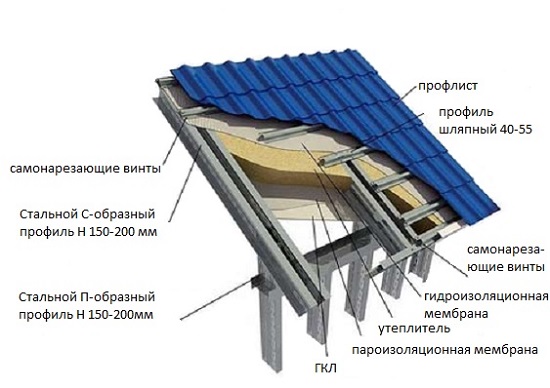
To protect the insulation from wind and moisture, special protective films are used. U-shaped vertical guides are attached to the brackets with rivets. They are necessary in order to level the wall. A gap is made between them and the protective film to ensure ventilation. Further to the guides, horizontal U-shaped profiles are fastened with a step, which should provide a sufficiently reliable fastening of the corrugated board.
The corrugated board is fixed to the wall using self-tapping screws equipped with rubber gaskets for sealing. The professional sheet not only provides an increase in the heat-shielding properties of the wall, but also acts as an original cladding.
As a result, a qualitatively insulated wall is obtained, which has an excellent appearance. - Wall cladding on the inside and outside.
In this case, the sheets of corrugated board are assigned the role of lining the existing insulated panel on both sides - external and internal.
At the first stage, horizontal waterproofing of the foundation is carried out using roofing material laid in two layers. Then, a lower guide profile is attached to it using universal anchor screws. In it, racks are installed and fixed in a vertical direction. The result is a frame that consists of rack-mount thermo-profiles and guide panels.
Further, the installation of corrugated board provides for a horizontal vapor barrier of several layers of film. It is attached from the inside of the panel and used for this purpose self-tapping screws with a countersunk head.
Insulation is placed in the frame of such thermal profiles, which is fixed with jumpers to prevent subsidence. There is no need for additional fastening of the insulation to the racks, since it itself has good elasticity.
Subsequently, a windproof membrane in the form of horizontal stripes is attached to the wall panel from the bottom up with the formation of horizontal and vertical overlaps. A hat profile is mounted on top of the film. At the same time, the film must be pressed against the wall panels. Fastening to racks is carried out using self-tapping screws.
The corrugated board is fastened directly in the lower trough through a single wave using self-drilling bolts equipped with a rubber gasket for sealing. Vertical joints are fastened with rivets.
- Wall device directly from corrugated board.
If there is no need for building insulation, the walls can be made of profiled sheet, which will protect the interior from negative atmospheric influences. We are talking about sheds and other structures where the wall does not bear the load, but plays the role of protection. The question of how to fix corrugated board in this case is quite simple. It is attached to the wall frame crossbars using self-drilling bolts with a gasket. In the lower deflection, it is fixed through the wave, and rivets with a step of 300 mm are used at the joints of the sheets.



Alas, no comments yet. Be the first!