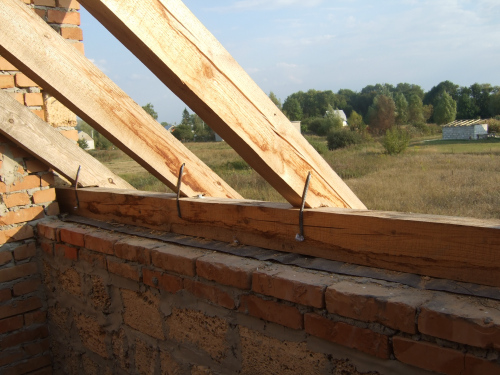
Mauerlat is a kind of foundation for the roof, because it allows not only to securely fix the rafter legs, but also to ensure uniform distribution of the weight of the structure along the upper perimeter of the building walls. The rafters can be attached to the Mauerlat in several ways, however, it is worth saying that the wrong approach will lead to the descent of the rafter legs and the skew of the roof. In order to prevent this from happening, we collected all the material regarding the installation of rafters on the Mauerlat in this article.
Content
Rules for fixing rafters
It is not easy to ensure a reliable connection of the rafters and the Mauerlat at the point of contact, but this is still possible if the following rules are observed:
- Use high-quality fasteners. Savings are unacceptable here, since improper hardware is not what you need to create a durable roof. Cutting should also be done very carefully, since you need to avoid the need to install gaskets, liners, etc. Such parts can provide a good connection, but over time they can deform or fly out, and the structure itself will weaken.
- Rafters need to be fixed only on metal corners or plates. Many installation manuals omit this point, but if before attaching the rafters do not stock up on such elements, you will need to buy them already in the process. Using other types of mounts is just a temporary measure.

For the installation of the beam, it is best to use nails or self-tapping screws if a temporary solution is required. To create a durable design, it is recommended to use special rafter fasteners and bolted or stud connections.
- Use a sliding mount when creating the roof of a wooden house. This technology is also suitable for connecting to the upper side logs and Mauerlat. An opportunity for gliding rafters is provided by special elements - a slide. The use of such products is mandatory.
- Before attaching the rafters in the Mauerlat, saddles are sawn down, which ensure a tight fit of the wooden elements to each other. In order for the cuts to be the same, templates are used. If the slope angles are different, then the templates will need to be made for each of them. The depth of the gash is selected within a quarter of the width of the rafter leg. Without using the template, you can also work, but this will require additional measurements, and possibly adjustments already in the installation process.
Installation of rafters should be carried out in such a way as to ensure that the roof is kept from rising even by strong gusts of wind. On the other hand, it is also necessary to solve the problem with a bursting force, which can also be quite large.

The connection of the rafters, for example on a diagonal rafter, must also be very strong. To achieve the required connection parameters, cuts are used, which allow structural elements to fit snugly against each other, and fixing is done by twisting with bolts.
Methods for creating a skate of a truss pair
Three main methods can be used in the ridge of the roof. The first of these is a butt joint. It assumes that the upper part of the rafter's leg is trimmed at an angle equal to the slope of the ramp, and then connects to its pair, which also went through a similar procedure.To get the same attachment points for the rafters, it is best to use a ready-made template. Fixation in this case is carried out using long nails.
The second option is to mount the rafters on the ridge run. This method is very similar to the above, but differs in that there is a ridge beam. The resulting design is quite reliable, but sometimes requires the installation of additional supports, which significantly reduces the functionality of the attic. Obviously, this technology is not suitable for small roofs, which are planned to be insulated and use the attic as another room. The advantage of this method is the ability to perform the installation of beams in place, and it does not require a template. The upper part of the rafters rests on a ridge beam, and the lower part on a Mauerlat.
The rafters can be connected in another way - with an overlap. It is very similar to the second, but the upper joint of the rafters is overlapped here. The resulting connection is strong enough, because the rafters have a large contact area, and the studs pass immediately through both elements.
Installation of the lower ends of the rafters
The method of fixing the lower ends of the rafters depends on the type of construction. For example, if the house is wooden, then the upper wall trim can be used as a support, but this should not be done in the case of gas or foam blocks. The problem is that it is necessary to fasten the rafters to the Mauerlat, because stone blocks can not cope with the retention of the rafters.

When working with walls made of foam blocks, you need to understand that the conditions in this case are special, which means that traditional methods will no longer work so well. For example, a 10 cm nail can be pulled out of the block by hand, therefore, it will not be possible to fix the twists here, because there is also pressure in the horizontal plane, which can be very large.
When using masonry materials, one of the best solutions is the implementation of a reinforced belt, which allows you to not invent new ways of attaching rafters. Usually this is a reinforced concrete structure located on the top of the wall. Its height is 200 mm, and the width coincides with the thickness of the wall. To perform the filling, formwork is required, created from ordinary boards connected by screeds.
Before pouring into the formwork, anchor bolts (or studs, d = 14 mm) are installed, which should be located strictly vertically. They are fasteners for the beam, which is mounted after the concrete has set strength. During pouring, it is necessary to ensure that the position of the studs is vertical, and their step is not more than one and a half meters. When using fasteners of a smaller diameter, it will not be so reliable and may bend.
Attaching rafters to a Mauerlat is the most common way to fix their lower part. This work must be done especially carefully, since the durability of the roof depends on the reliability of the joints. To create such a connection, you will need to make a cut (notch) in the rafter leg so that it is worn on the Mauerlat beam. Without this, it is impossible to install the rafters reliably, because sooner or later the flat edge of the bar will simply slip off.
Sometimes a reciprocal notch is made in the Mauerlat. It all depends on what kind of wood the timber is made of. When this element is made of hardwood, it is enough to make a slot, which will act together with the slot of the rafter legs, forming a persistent lock. The rafters are attached to the softwood Mauerlat without a slot, since it only weakens the reliability of the structure.
Beam mount
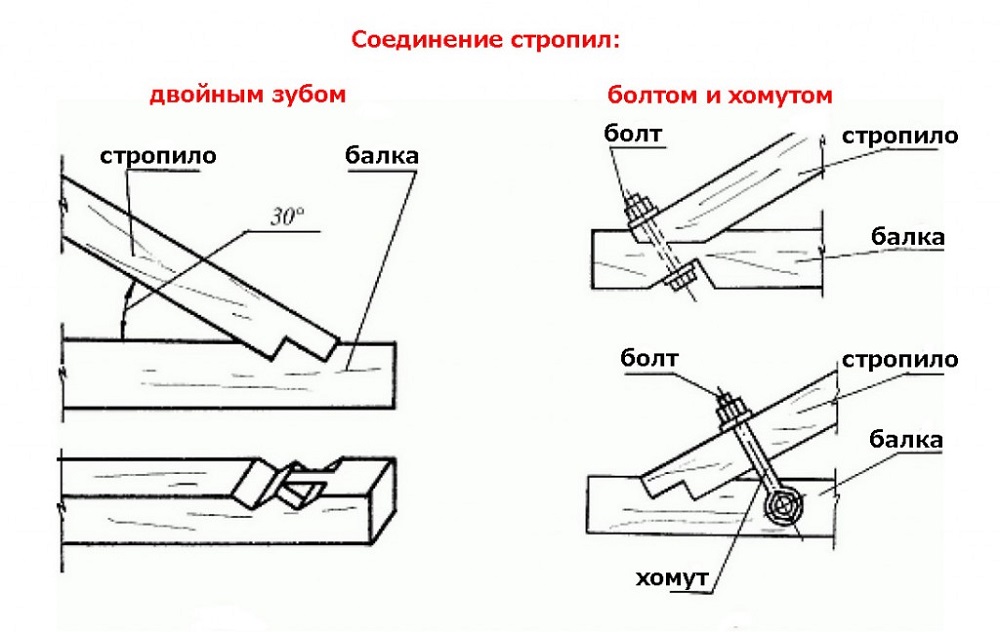
The simplest option is to attach the rafter to the beam, and then fix the structure with nails, but the reliability of such a roof will be low.In the best case, it is suitable for a gazebo or a small outbuilding, and for the house you need something more durable.
To avoid sliding of the elements relative to each other, the rafters are fastened to the floor beams through special connections:
- tooth with a thorn;
- emphasis on the tip of the beam;
- tooth with emphasis.

The connection can be made using 1 or 2 teeth. It depends on which slope angle is selected. To increase reliability, metal corners can also be used.
Felling with one tooth is performed when the roof is steep enough (the angle of inclination of the slopes is more than 35 degrees). A tooth with a spike is made on the heel of the rafters, and an emphasis with a nest for the spike is performed in the beam. The depth of the nest should be from 0.25 to 0.3 of the thickness of the beam. Compliance with the depth within the specified limits is required so that there is no weakening of the structure. The fastening of the rafters to the beams should be selected at a distance of 25 to 40 cm from the edge, since this avoids chipping of the beam end under the pressure of the rafter's leg. A spike on a single tooth may not be used, but it is precisely it that is needed to prevent lateral shear rafters.
When the angle of inclination of the hollow roof is less than 35 degrees, the legs are mounted so as to expand the area of contact due to overlapping with the beam, i.e. by increasing the supporting leg. In this case, fastening can be done in the following ways:
- focusing with or without a spike;
- in 2 spikes;
- 2 spikes in the castle.
In the first case, it is supposed to use a tenon notch with an emphasis only for one tooth and a separate emphasis for the second. An eye with the required characteristics is cut down in the rafter's leg itself. The rafters are fastened to the floor beams in this situation with the help of a notch with a depth of 1/3 of the thickness of the beam. If the insertion depth is different, it is recommended to use the following values: 1/3 for the first and? for the second.
The least common method is to install the rafters at the end of the tightening, for which an emphasis tooth is cut in the rafter's leg. One of its planes should lie on the very edge of the beam, and the second should rest against the cut, the depth of which is selected more than a third of the entire thickness of the beam, and the emphasis should be carried out as far as possible from the edge.

To increase the reliability of the connection, you need to use rafter bolts or clamps, after which the entire assembly is mounted to the wall of the building - an anchored crutch embedded in it. For this purpose, iron strips or wire loops are used.
Having considered how the rafters are attached to the beams, you can proceed to the methods of mounting them to the Mauerlat.
Mauerlat Mount
As mentioned above, the type of interface should be selected taking into account the design of the roof, because somewhere it is impossible to do without a rigid joint, and somewhere sliding is best suited. In the first case, the positive stillness can be noted the complete immobility of the structure, which means that there will be no shifts, turns or torsion of the elements. There are two ways to achieve this:
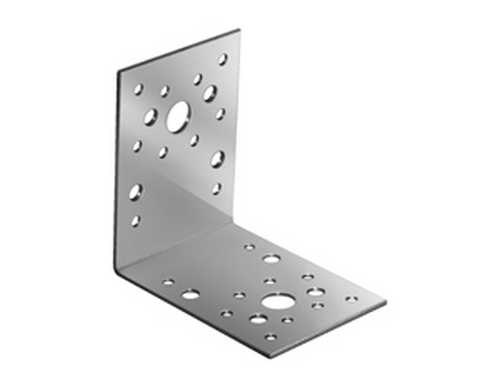
- through the use of corners with a hem;
- by creating a saddle on the rafter leg, after which the connection is fixed with nails, wire and staples.
In the first case, it is assumed that the rafters will be attached to the Mauerlat using a support beam. The rafter leg abuts firmly along the pressure line, which is made possible thanks to the hemmed beam (up to 1 m in size), after which metal corners are fixed to prevent lateral displacement.
The first installation method is rarely used today, since the second installation option is gaining more and more popularity. In this case, the fastening is carried out with nails hammered at an angle in the direction to each other. They are crossed inside the material, and then the third nail is already vertically hammered.The resulting fasteners have sufficient rigidity, however, in both cases, additional fixation is performed due to the wire rod.
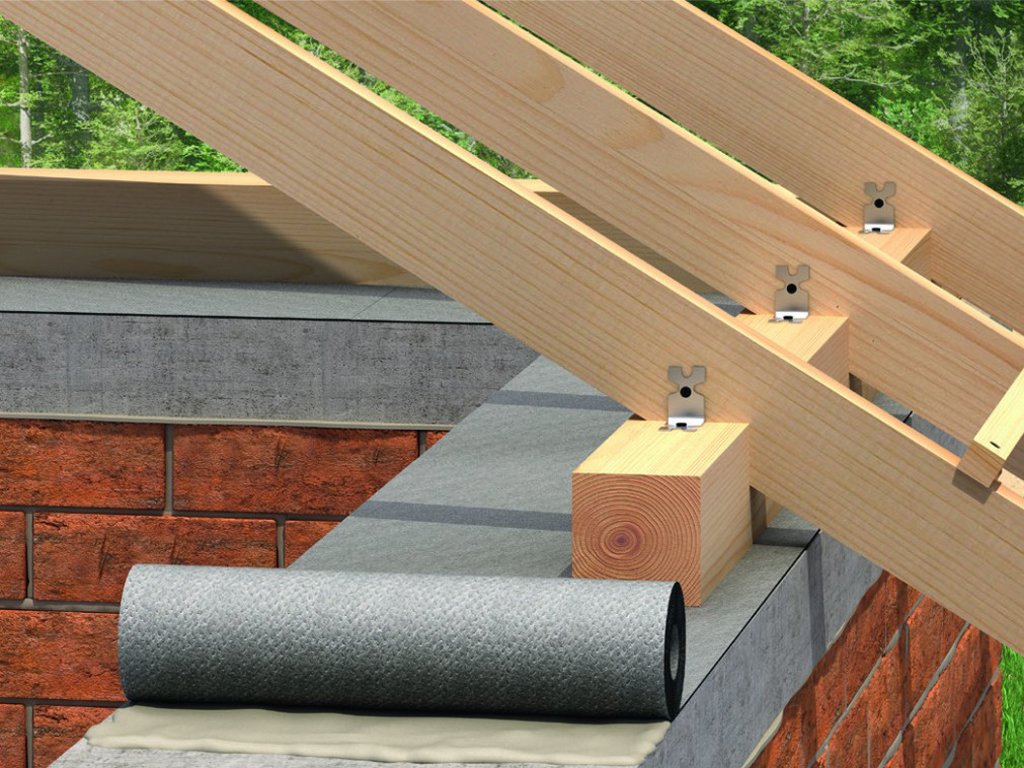
Mounting rafters to the Mauerlat can be made and sliding. In this case, you will need fasteners, which are shown in the figure below.
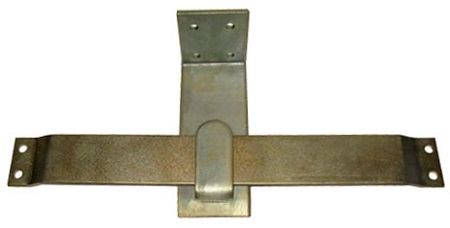
It allows one of the mating elements to slide freely in both directions, therefore it is well suited to allow for shifting.
When using such elements, you must:
- perform a gash and lay the rafter leg on the Mauerlat;
- connect the elements using the fasteners shown in the figure.
Of particular interest is the sliding joint for wooden buildings, which are prone to slight shrinkage during the service life, which leads to a violation of the geometry of the house and can cause damage to the walls or roof if rigid joints are used.
Summing up, it is worth saying that in this material we examined the methods of mounting rafters to the Mauerlat and showed methods that make it possible to make a reliable connection of rafters and beams, however, behind the scenes there were moments such as restoration work, as well as lengthening of rafter legs. If you also needed this information, it is easy to find on our website.



Alas, no comments yet. Be the first!