There are many material options for building a private house in the modern market. The most common - brick, block and logs. But recently, frame houses are gaining more and more popularity. They are distinguished by simple and quick installation. It can be produced independently without the help of professionals. Below you will find recommendations on how to build a roof frame house with your own hands.
Content
Design features
The roof structure is heavy and rests on the supporting walls of the house. In the case of a frame house, the roof is installed on vertical racks, sheathed with OSB plates to the middle of the timber of the upper harness. Decorative wall cladding is done after installation of the roof. And after that they produce the filing of the gable and cornice overhangs.
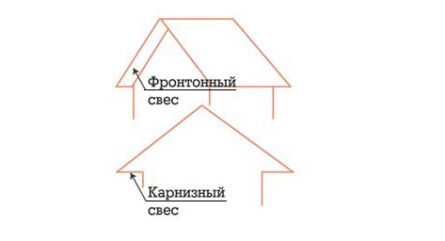
Pediments erected and sheathed before the roof is assembled. Therefore, before starting work, you need to prepare a project where the appearance of the roof and its slope will be determined. The pediment can also be mounted in parallel with the installation of the roof, but first you still have to install the extreme rafter trusses, which are reliably fixed with braces.
The roof height of the frame house is usually more than 6 meters. Before starting work, it is necessary to determine the type of rafter system. Depending on the width of the span to be covered, the rafters may have a ridge board, a support screed or sloping braces, if there is a central load-bearing wall. If the span is small, then they usually install rafter puffs. As a supporting screed can be attic walls.
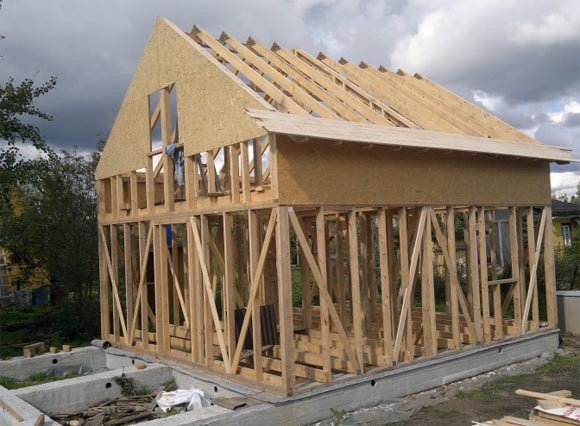
Rafters are fastened with nails, screws, metal plates or corners. The rafter pitch is determined within 40 - 100 centimeters. This figure depends on the size of the cross-section of the wooden beams from which the racks are made. They can be within 2.5 - 5 meters.
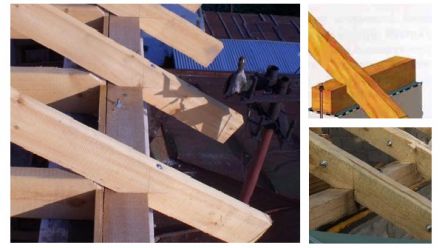
On the external supporting vertical racks of the wall, for supporting the rafter legs, wooden blocks are laid with a cross section of 10x10 centimeters, called Mauerlat. A prerequisite for its installation is a rigid fixation. Joining rafters is best done with toothed pads. If the span to be covered is more than five meters, installation of a special support for the rafters is necessary. After installation truss system for laying the roofing, install the crate. It can be made of OSB-plates, plywood, edged, semi-edged or unedged boards. It depends on the roofing chosen.
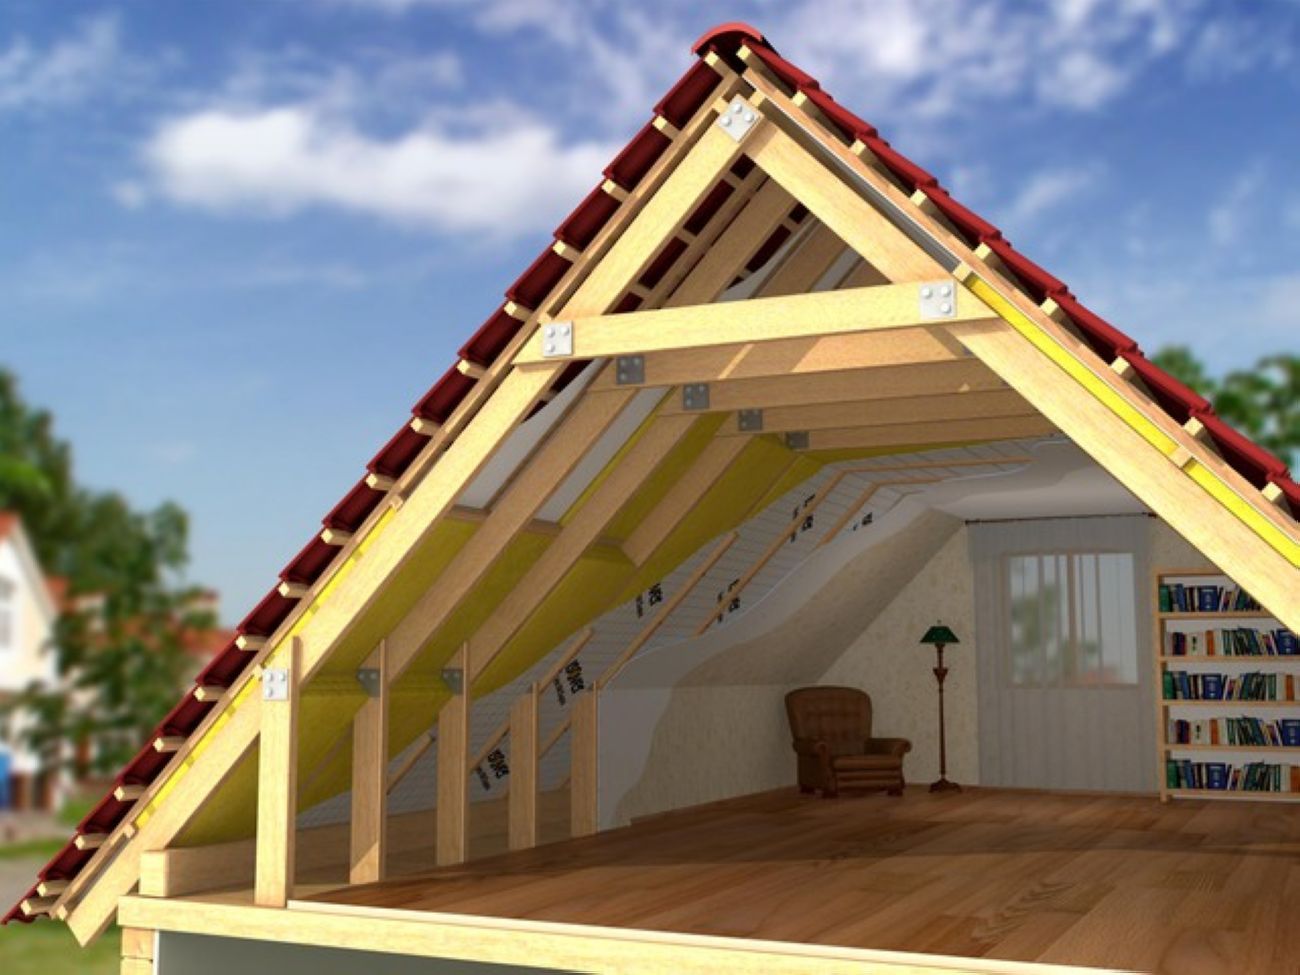
Subject to the presence of an attic floor, the roof must be insulated. Insulation is placed between the rafters. Provided that its thickness is 10 - 15 cm, the cross section of the rafters will be 15x5-15x7 cm. The cross section of the rafters is selected according to the thickness of the insulation and the size of the snow load. For this, calculations are made. If there is no way to conduct it, then take the section of the rafters more. With a thickness of insulation more than 15 cm, rafters with a cross section of 20x7 cm are suitable.
When installing the rafters on the Mauerlat, a triangle equal to 1/3 of the height of the rafters is cut out in the support bar.
The roof may have one or more slopes. At the same time, a complex roof looks more interesting. But the best option, both for the amounts spent and for the work carried out, is a gable roof. It has no endows and it has only one horse, which will be a definite plus when erecting a roof with your own hands, since these places in the structure are the most vulnerable.
When choosing a slope value, it should be borne in mind that with an indicator of less than 28 degrees the load on the rafter system increases. This will lead to the need for strict calculation and control of the bearing elements. And with a slope exceeding 50 degrees, wind loads increase. The optimal choice would be a slope within 35-45 degrees. Such a roof will look better, and the snow on it will not linger.
Roof mounting
We will consider the installation of the roof using an example of a house with overall dimensions of 6x8 meters, a gable roof with a slope of 45 degrees, where bitumen slate is used as a roofing. The design provides for an attic floor with a wall height of 1.1-1.6 meters.
The height of the walls of the attic floor is less than 1.1 meters. This will cause inconvenience in the operation of the under-roof space. In a cold attic, walls do not need to be raised, and the roof structure will not change.
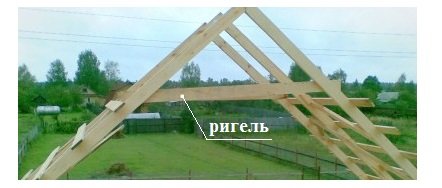
As the rafter system, we will use two inclined rafter legs connected by a crossbar to ensure rigidity. It is also called puff, jumper, cross member, etc.
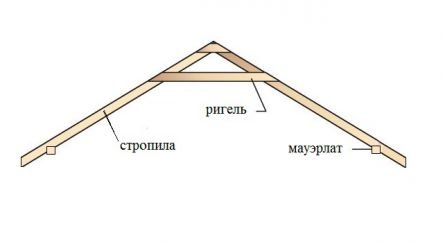
The presence of an attic floor suggests roof insulation. Therefore, we will choose the parameters of 15x5 cm as the section of the rafters. And we will take the thickness of the insulation 15 cm (according to the calculation for Moscow - 138 mm).
Next, you need to determine the length of the rafters. This can be done by making calculations. First of all, you need to determine the angle of inclination. If you still do not know which slope to choose, follow the instructions below.
Two slats 6 meters long must be knocked down with nails in the form of the letter "L". This will clearly show how the rafter farm will look. The work is carried out on the ground. After that, it is worth preparing a trial crossbar. It is a long rail, which is applied to the rafters in order to measure its length.
After that, we raise the resulting farm to the roof and rest on the timber of the upper harness. Next, the selection method is determined with the angle of inclination and, accordingly, with the length of the rafters. When determining this parameter, it must be taken into account that the overhang of the rafters relative to the wall should be 30-55 cm.
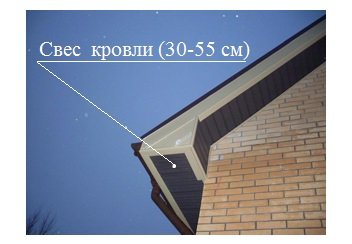
Overhang roofs are made to protect the walls of the house from atmospheric precipitation. In the absence of a drain, overhangs are made at least 50 cm.
With this method of selecting the length of the rafters, it is necessary to take into account that the final height will be 5 cm lower due to installation on the Mauerlat. To make such an installation, a 5x5-5x6 cm rectangle is cut out in the Mauerlat bar. Thus, we designate one side of the triangle, and mark the second on the ground at an angle of 90 degrees.
The rafter pitch is determined depending on the cross section of the rafters and the roof slope. For the example in question, a step of 70-80 cm is best suited.
Sometimes it is recommended to reduce the pitch to 60 cm, so as not to cut the insulation. But such a decision will lead to an increase in the number of rafter legs and, accordingly, material costs.
The next stage is the preparation of the required number of rafter legs. To do this, use the already marked rafter truss. These works are worth carrying out on the earth. Each next rafter foot is marked with the first sample in order to prevent the accumulation of errors.
Then proceed to the fastening bolts. The best place to place them is as low as possible. The crossbar is necessary to perceive the spreader, and the lower it is, the better it works.
In the presence of an attic floor, the best mounting height of crossbars is 2.25 - 2.35 meters. This will allow you to place doorways 2.1 meters high. With a decrease in the height of the openings, you can position the crossbars below. But at the same time, the height of the rooms will be, accordingly, lower. To make the height of the premises equal to 2.5 meters, which is considered the most convenient parameter, the crossbars are made at an identical height of 2.5 meters.
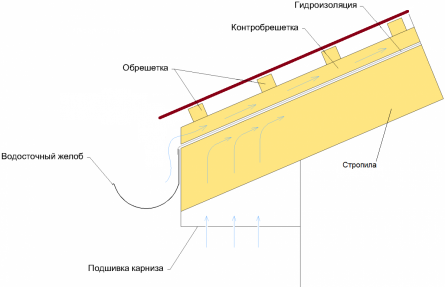
The presence of a counter-lattice will provide a clearance for ventilation in the roof.There should be two of them - the lower and upper ventilation gap, each 2-4 cm high. This is done regardless of whether the roof is insulated.
The lower ventilation gap is made under a layer of waterproofing, and the upper one is above. They allow the weathering of condensate and prevent the accumulation of water. The presence of both ventilation gaps will be a condition that the wooden elements are not covered with mold or fungus.
The counter-lattice is attached to the rafters along. The step for them is chosen in accordance with the step of the rafters. The cross section of the boards for these purposes is suitable 2x5 cm.
Next, we mount the lathing. The size of the section and step will depend on the selected material for the roof. By the condition of our example, this bitumen slate. Therefore, we choose unedged boards for the lathing with a section of 4x5 cm. And we will mount them in increments of 35 cm.
The length of the crate is chosen taking into account the presence of an overhang for the extreme rafter leg of 20-50 cm. It can be equated to the overhang of the rafters.
Material selection
Unfinished wood (sometimes called wet) is suitable for roofing.. You can buy it at the sawmill. When choosing pay attention to appearance. If the wood is gray, then this may indicate the presence of a fungus. Undried wood will require less financial investment than dried wood, because its price depends on cubic, not square meter.
After buying, you should definitely remove the bark from the wood - this will prevent the formation of bark beetles.
After calculating the roof elements, an order should be made for the material. It should be borne in mind that the standard length of lumber will be cheaper. And you can trim them yourself, spending the rest on something else.
Video instructions for assembling the frame roof
//www.youtube.com/watch?v=5gJY5eUPZnM



Alas, no comments yet. Be the first!